answer caret-left caret-right close-large facebook hamburger linkedin mail password question repeat-password thumb triangle twitter username youtube circle-right trending search checkmark pin alert

The processing of flat wafers (5/7): Baking plates II.

The processing of flat wafers (5/7): Baking plates II.

This is the fifth of seven installments covering all the facets of flat wafers processing, which continues discussing details regarding the very important issue of baking plates.

Consideration has always to be given to the evacuation of steam that would be difficult from a continuous plate base; this is why manufacturers don’t like dimensions of transversely mounted plates to be greater than 350 mm in the direction of product flow.

Regardless of plate width, steam has only to travel 175 mm from the centre of each plate if its overall length is only 350 mm. Depositing is nevertheless an area that requires attention as it is still a major cause of production problems due to blocking of the nozzles or holes (hence the importance of sieving the batter after mixing and prior to transferring to the holding tank). The holes are normally approx. 2.0 – 2.5 mm in diameter and are usually “adjusted” on site by the commissioning engineer on a very ad-hoc basis. Depending on the solids in the batter (recipes) several depositing arms may be available with a variety of apertures.

It is not uncommon and is a fairly good practice to have duplicate arms available as a backup for quick change over should the need arise. Higher solid batters generally give crispier rather than tender / short eating wafers. A less successful idea introduced by some oven manufacturers was to give as an option a variable length to the horn (the bar which supports the top plate during the opening and closing cycle) so that the plates could remain open longer allowing steam (moisture) to flash off.

Plate gap setting of each book is predetermined and set at the supplier’s factory based on the specification required and agreed with their clients. Minor adjustments can be made easily to maintain the setting once determined; this usually involves adjustment to 4 corners and 1 central (5) bolt or similar depending on suppliers design. This is not however an adjustment that should be required frequently, at most a couple of times per year and may be identified by slight localized color change or weigh variation. If more frequent adjustment is required the problem may well be caused by wear on the hinges of the plates or play in the latch closure mechanism as well as the position of the top plate buffer stops.

Measuring the plate gap setting used to be done with feeler gauges, more frequently now it is done by measuring soft silicone pieces (at one time soft pieces of lead where used) placed at 5 points on the lower plate and bringing the top plate down to meet its partner. The size of the plate gap required should be determined from the finished wafer. The two are not necessarily the same. The wafer sheet will almost always be thicker. It is estimated that on modern installations this can be from 5-15 %. On older slower plants, this could be from 20-30 %. It is also interesting to note that a sheet made from a successful formula which does not stick to the plate is usually released some 2-3 mm less in both length and width than the plate on which it was baked. This is a consideration when calculating piece size and off-cuts.

The wafer is considered baked when it comes from the oven and is cleanly released from the plate with the correct color and at the correct moisture content. In order to achieve this, a baking time must be selected. Commercially, this has usually ranged from 1-3 minutes with the average falling in the 1.5 – 2.0 minute range for ovens up to about 90 plates. (Longer ovens with up to 120 plates have baking times usually over 2 minutes; this is due mainly to physical constraints on the chain carriers and drives). The faster the bake, the higher the plate temperature needs to be.

The plate temperature is not often indicated on older ovens but is standard on newer units and is usually between 150-200°C. Depending of the age and the supplier of the oven an infra red sensor measures the plate temperature either on the engraved face of the upper plate or on the back of the plate. Any temperature comparisons between ovens should bear this in mind. In some factories one may see indications of temperatures at say 105 / 110°C producing very satisfactory wafers. The odds are that the measuring instrument is incorrect and requires attention; however, as it is this, which is used as a daily reference, and the wafers are acceptable, the tendency is often to leave it alone.

Good manufacturing practice would suggest that it should be determined as to what the actual temperature really is and the “fault” corrected. For this reason, it is easy to see how color variation occurs as previously mentioned with regard to depositing. Fast bakes with high plate temperatures often lead to the problem of “shelling”. This is a situation in which separation of the individual sheet takes place and can be seen in the form of flakes or pieces shelling from the surface of the naked wafer. Often this only takes place after further processing or once the product has been wrapped.

Plates with too low a real temperature on the other hand will result in irregular distribution in moisture and warped sheets. Wafer ovens are heated by gas or electricity with the former being most common and preferred. With gas ovens, strip burners or similar are positioned below the wafer plate chain carrier, on the upper and lower run. The continuous flame impinges onto the plate as it passes and it should be maintained at a stable and uniform height. The ideal, according to some manufacturers, would be 25-40 mm, as at this distance from the strip, the flame temperature would be at its optimum.

In some locations where gas is not an option infrared encapsulated quartz tubes are used, but by and large electric heating tends to be expensive. A series of tubes are located in a position in close proximity to the back of the self supporting baking plate heating from the top on both the forward and return run. Notwithstanding the energy cost, given the choice most production people would go for gas heating. From time to time it is still possible to see in a few locations (thankfully not to frequently these days) ovens run on a Vap-O-Fire system, where fuel oil is converted to gas in units alongside the oven and then distributed to the burners. The original company supplying this system ceased to exist years ago and as spare parts became difficult to find and gas or LPG became more readily available conversions have been made.

Transfer of heat to the plates is essentially by radiation and convection (and by conduction if the flames impinge on the plate). The batter between the plates is baked into a wafer by conductive heat. A good flame from the burners of any gas-fired system would ideally be sharp and blue with a slight pink tinge around its edge. It is this blue centre that is hottest, and the burners should always be maintained to give this characteristic. Some ovens are now also fitted with triangular shaped burners that can be adjusted in position as well as easily dismounted individually for periodic cleaning as necessary.

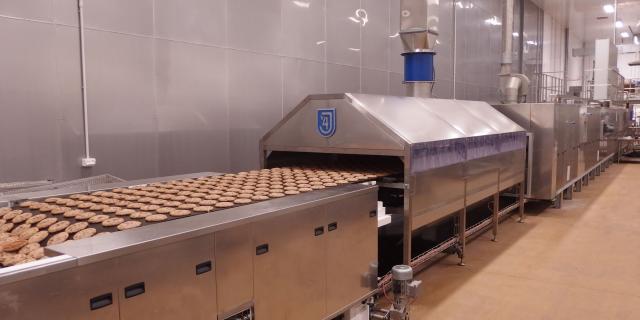
Wafer ovens have one or more extraction chimneys with damper controls to take away the products of combustion, etc. Although not common to have a thermometer here, it has been estimated that extraction temperatures of around 200°C (392°F) would be normal. A baking time, once having being established, should be maintained. Adjustments to pressure are to be preferred to the slowing down or speeding up of the baking time when color or moisture changes may be required. Moisture would normally be within the range of 1-2 %. Wafers should leave the plates cleanly and as a complete sheet.

It is essential to aid the movement to the star wheel transfer mechanism by ensuring that fine nozzle air blowers as well as sheet deflectors are correctly positioned to help avoid damage to the wafer in the form of broken corners or cracked and split sheets. After baking, the individual sheets should be cooled as soon as possible. It is preferable not to stack the sheets in boxes, as was once the case. This is because the heat of one sheet on top of the other has the effect of extending baking or perhaps more correctly, drying, resulting in possible shelling and warped sheets. The temperature of the sheet, as it leaves the plate can be about 60-70°C.

Cooling 
Ambient cooling on “arcs” or “windmills” or as is now more the case Arch coolers take place after baking, with speed in line with oven output. These coolers are designed to treat the wafer sheet gently to avoid breakage and warping. Depending on ambient conditions, it is possible that the wafer sheet can pick up some moisture during this period. It is certain that any inconsistency in bake resulting in uneven moisture distribution within a sheet will start to show up here. As the moisture starts to equilibrate the sheet will warp and in extreme cases will crack. Temperature after cooling would be about 30°C (86°F) cooling time being between 3 -3,5 minutes.

Related articles:

The processing of flat wafers (1/7): Wafer Ingredients 

The processing of flat wafers (2/7): Pre-baking processses

The processing of flat wafers (3/7): Baking specifications

The processing of flat wafers (4/7): Baking plates I.

The processing of flat wafers (5/7): Baking plates II.

The processing of flat wafers (6/7): Post baking procedures

The processing of flat wafers (7/7): Cooling, cutting and conditioning

Be sure to subscribe to our newsletter by registering so that you do not miss any of our articles and insights.Be sure to subscribe to our newsletter by registering so that you do not miss any of our articles and insights.

______________

Leading image: MAHATHIR MOHD YASIN/Shutterstock.com

References:

  • M.B.R.A. Reports
  • Technology of Biscuits Crackers and Cookies – D.J.R. Manley
  • Biscuits Crackers & Cookies – Bill Smith
Want to know more?
Ask industry experts in Biscuit People TechTalks section.
Read more from Our experts
Read all
What Are the Most Important Aspects To Control in Flour?
in
Our experts
Ever wondered how flour - a key ingredient in baking - can make or break your perfect recipe? Discover the crucial parameters and tests that reveal th...
Climate Change - Our Carbon Footprint
in
Our experts
Gas has been and continues to be the predominant fuel for biscuit baking ovens world-wide. The combustion of natural gas is a major source of greenhou...
Maximizing Comfort and Savings With Spot Cooling in Bakery Industry
in
Our experts
Spot cooling is a type of cooling system that focuses on cooling specific areas, rather than cooling an entire space. This can be achieved using porta...
Looks like you don’t have a subscription to do that. Want to upgrade?
Upgrade subscription